Preparing the lighting setup and gear.
In Part 1 I explained my idea and showed you my sketch. If you missed part 1 you can find it here!
In Part 2 I will explain my analyse of the light settings I probably will use.
As you can see in the image I got a moon. The moon will be my main light. I will probably create the background with different photos.
One on the road
One House
One cloud
One for the background
One UFO
and one with the Boy and his teddy and flash.
So all this photos need to have a light source at the same level as the moon.
So I will be very picky regarding this main-light source on all my elements.
I will take the images in sunlight and in Photoshop make it look like its night and replace the sun with the moon. I will do that because of the shadows from the sun. It will increase the shadow contrast and bring some drama to the story of the image. In real life this will end up strange, though the moon will not cast that hard shadows in real life. But I like the arty-style and contrast and hard lines are important to create that effect.
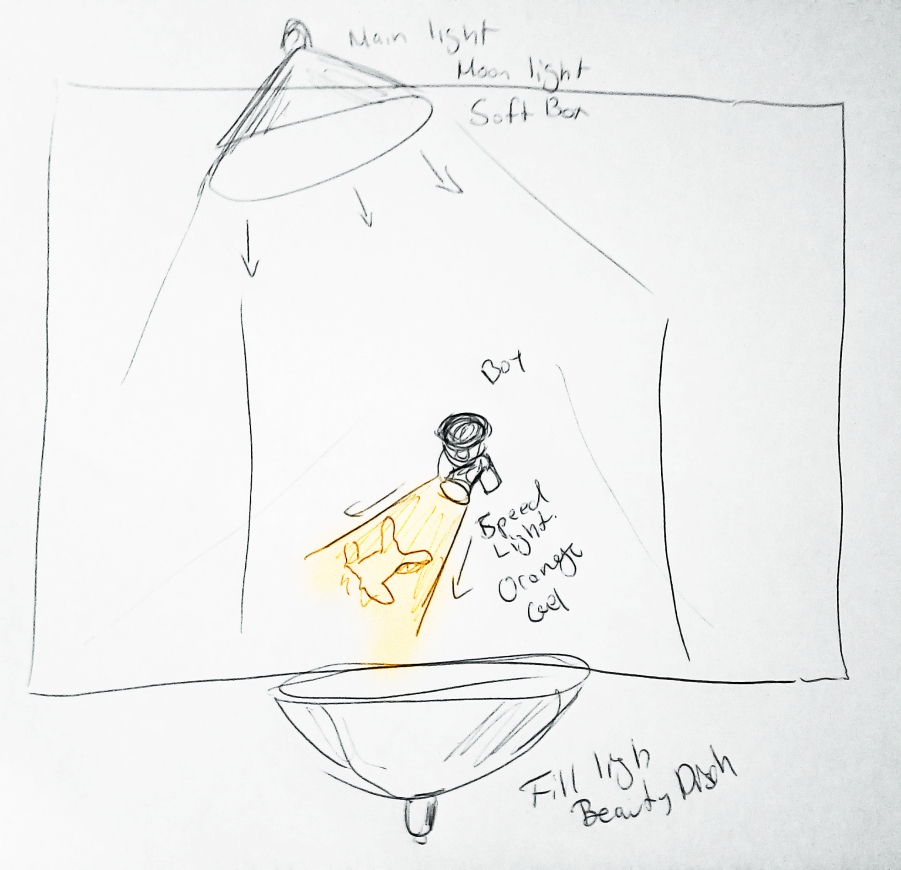
For the flash on the boy flashlight I will probably use a motivated light source.
Motivated light source is when you use a light source to increase the ordinary light effect or add a light effect to the image. When I use a main light behind the boy and some fill light in front of him the flash will not appear because it’s effect is to low. I will therefore add a motivated light maybe a Speed light with orange gel for it.
I will probably use a beauty dish or a soft box for the fill light on the boy. The moon probably is simulated with a soft box or a beauty dish. This is something I will test when I shoot the boy. Probably I will use a beauty dish to simulate the moon though it’s a harder light source than a soft box.
Stay tuned for Part 3.
to be continued…
In this series:
Part 1
...
Part 3
Part 4
Part 5
Part 6
Part 7


6 thoughts on “What happened to my Teddy? PART 2”